Active Cooling the NVIDIA Tesla T4 for Homelab Use
The Problem With Passive GPUs in a Homelab
The NVIDIA Tesla T4 is a data center GPU. It ships with a passive heatsink — no fan, no active cooling — because it was designed to live in a rack server with high-velocity forced airflow moving through the chassis. In that environment, the passive heatsink works perfectly. Slide it into a homelab server that was never designed for that kind of airflow, and you have a problem.
The HP Proliant MicroServer Gen 8 is a compact, quiet machine. It has one small rear chassis fan and no GPU bay airflow to speak of. Under any real GPU load — inference, emulation, simulation — the T4 will throttle and eventually shut down from thermal stress. The passive heatsink is not moving enough heat.
The fix is straightforward: replace the passive heatsink with an active cooling solution designed specifically for the T4 form factor.
The Solution: n3rdware Modified Heatsink Kit
n3rdware makes a modified heatsink and fan kit purpose-built for the Tesla T4. The kit replaces the original passive slab with a lower-profile heatsink and mounts a fan directly to the card. It is one of the few purpose-built solutions for this exact use case — most T4 cooling mods are improvised.
What You Need
- n3rdware T4 heatsink + fan kit — modified heatsink with fan mount, fan included
- 4-Pin GPU Fan Header Adapter Cable — the T4 does not have an onboard fan header; this cable adapts the fan connector to a standard 4-pin motherboard header
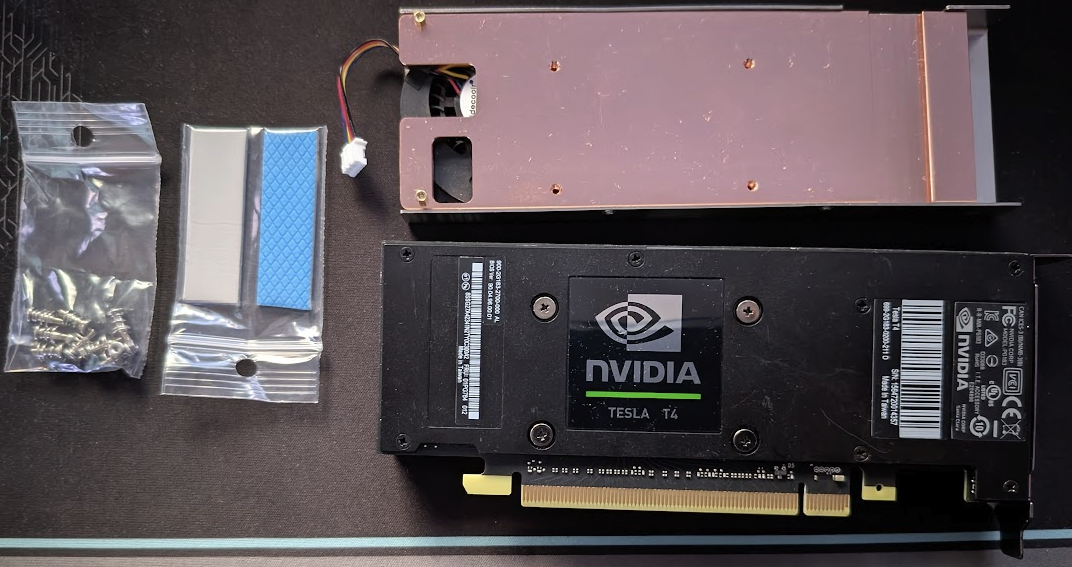 T4 with the original passive heatsink removed alongside the n3rdware replacement kit and hardware
The Build
Step 1 — Remove the Original Passive Heatsink
Power down, remove the T4 from the PCIe slot, and set it on a static-safe surface. The original heatsink is held by four screws at the corners of the GPU die area. Remove them, lift the heatsink straight up, and clean the thermal interface material off both the GPU die and the heatsink contact plate.
Apply fresh thermal paste before installing the new heatsink. A thin, even layer on the GPU die is sufficient — the contact plate on the n3rdware heatsink is flat and makes good contact.
Step 2 — Install the n3rdware Heatsink
Mount the new heatsink using the provided hardware. The screw pattern matches the T4’s existing mounting holes — no drilling or modification required. Torque evenly across all four corners to ensure consistent contact pressure across the die.
The fan ships pre-mounted to the heatsink bracket. Once the heatsink is seated, the fan sits flush against the card.
Step 3 — Route the Fan Header Adapter Cable
The T4 has no onboard fan header. The fan connector coming off the n3rdware kit is a standard 4-pin PWM connector, but it needs to reach the motherboard’s fan header — which on the Gen 8 is not close to the PCIe slot.
The 4-pin GPU Fan Header Adapter Cable bridges this gap. It is a short braided cable that converts between connector types and gives enough length to route cleanly to the nearest available fan header on the motherboard.
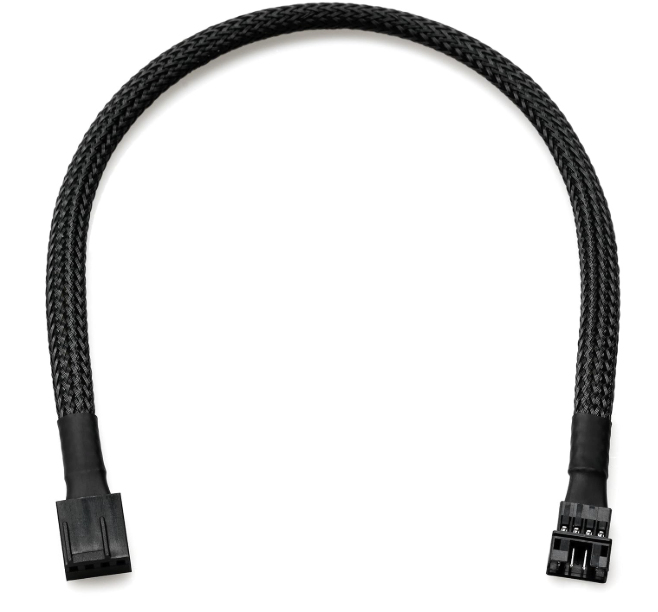 4-Pin GPU Fan Header Adapter Cable — bridges the fan to the nearest motherboard header
Connect the fan end to the fan, route the cable along the card edge, and plug the other end into an available 4-pin header on the motherboard. The BIOS will pick up the fan on that header and manage it with PWM speed control automatically.
Step 4 — Reinstall and Verify
Seat the T4 back in the PCIe slot, cable-manage the adapter cable so it clears the chassis fan, and power on. Under the BIOS or your OS fan control utility, you should see the new fan reported on whichever header you connected it to. Under load, the fan will ramp up with GPU temperature.
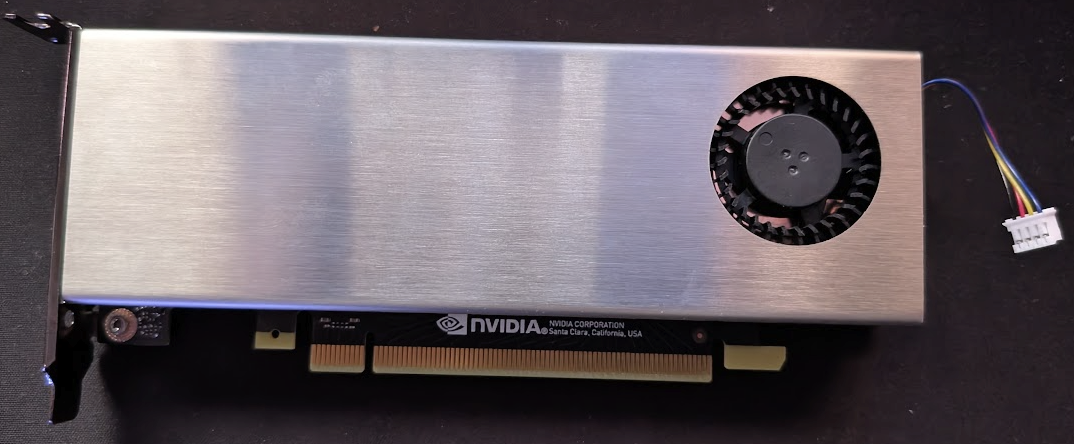 Completed assembly — the T4 with the n3rdware heatsink and active fan installed
Results
With the mod in place, the T4 maintains stable temperatures under sustained GPU workloads in a low-airflow chassis. Thermal throttling is eliminated. The fan is audible under heavy load but quiet at idle — PWM control keeps it at low RPM when the GPU is not being pushed.
For a homelab that actually uses the T4 for inference, emulation, or compute jobs, this mod is the difference between a GPU that throttles and shuts down versus one that runs reliably. The n3rdware kit handles the engineering — you just need to swap the heatsink and route one cable.
Parts List
| Item | Source |
|---|---|
| NVIDIA Tesla T4 | Used market (eBay, ServerMonkey) |
| Modified heatsink + fan kit | n3rdware.com |
| 4-Pin GPU Fan Header Adapter Cable | Amazon / local electronics |
| Thermal paste | Any quality compound (Noctua NT-H1, Thermal Grizzly Kryonaut) |